Chapter 2 of 10
Bring in your charges
A charge can come in by hand, from a spreadsheet in Excel, or on its own, from your invoicing tool's email. All three work at the same time and none rules out the others.
If you issue electronic invoices, start with email: it is the only one that never asks you to do the work again.
Create a charge by hand
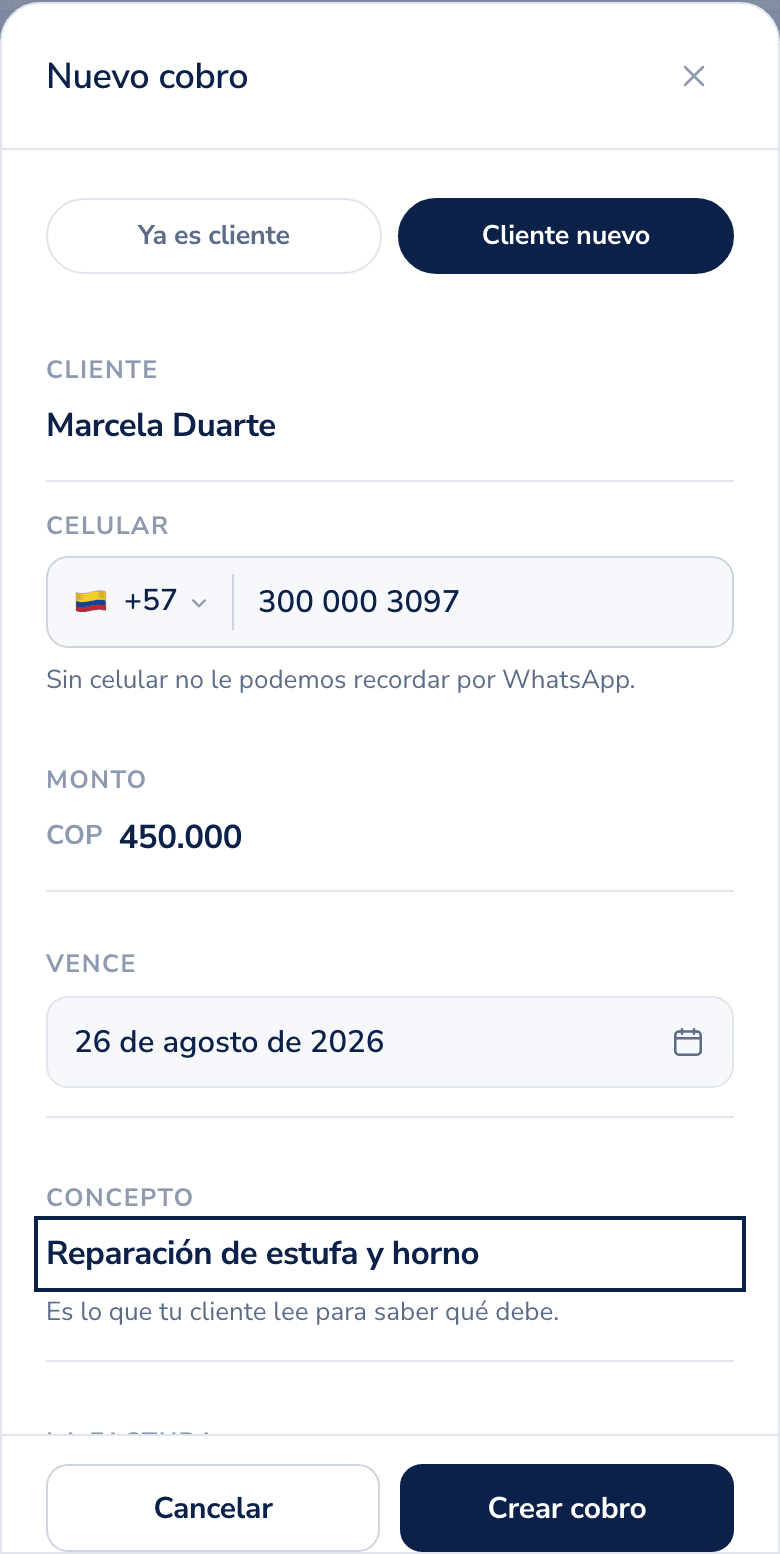
Twenty seconds and it is running. You do not need an electronic invoice, a tax id for your customer, or a document number: a name, a mobile, an amount and a date are enough.
Do it in three steps
- Tap the Charge button. It is always in reach, on any screen.
- Write the customer name, their mobile with country code, how much they owe and when it is due.
- Save. That is it.
What happens next
Cobbi schedules the reminders on its own: eight per charge, spread across that invoice's term, and the exact dates are on the charge card as soon as you save it. If they pay, the rest never go out.
They go out at 9 in the morning and never on weekends, unless you change those two values in Settings.
The first one goes out under your business name, with your payment details, and your customer pays you directly. The money never passes through us.
If the mobile is missing, the charge is still created and waits. With no mobile there is nowhere to write, and that is one of the reasons a reminder is not sent.
Got many at once? Upload your book in Excel.
Create a chargeUpload your book in Excel
If you already track what you are owed in a spreadsheet, do not type it again. Upload it and every charge is created at once.
Do it in three steps
- Leave four columns in your file: customer, mobile, amount and due. If you have a reference or invoice number, put it in a fifth one.
- Upload it from Charges. Excel and CSV both work.
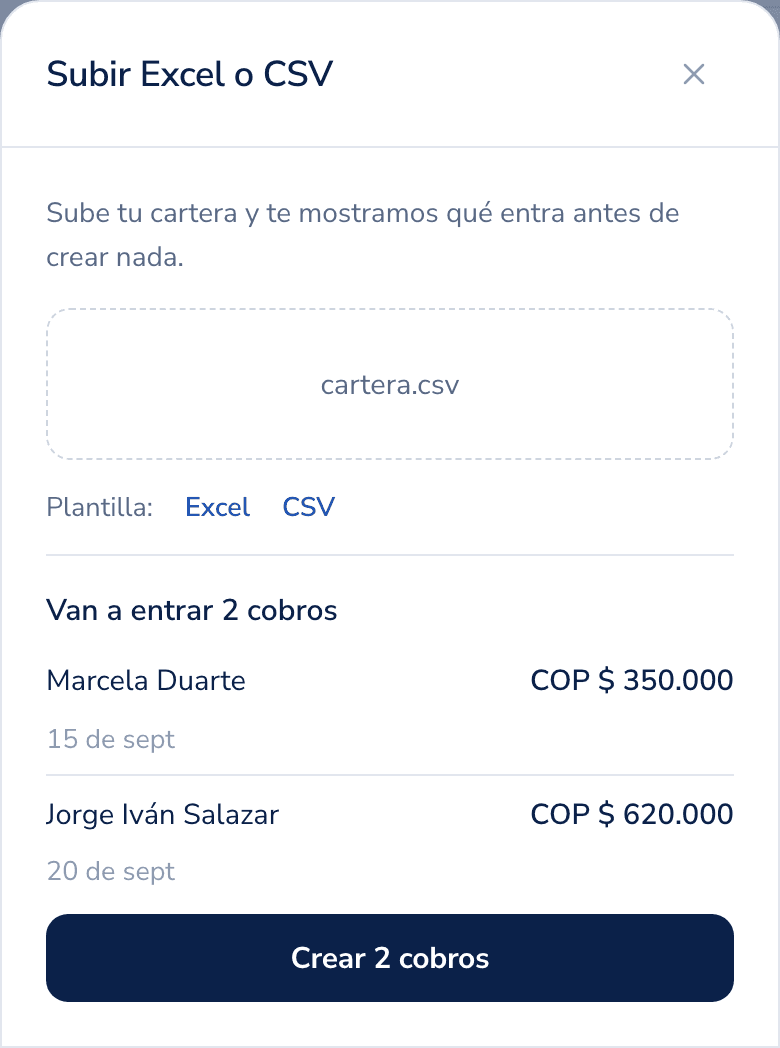
- Check the preview and confirm. That is where you see how many come in and which rows look off.
How to write each column
- Mobile: with country code, for example
+57 300 123 4567. If a customer has none, leave the cell empty: the charge is created anyway and you add the mobile later. - Amount: just the number, no currency symbol.
450000works;$450,000works too. - Due:
2026-08-20or20/08/2026. Both are understood.
Rows that cannot be read are never half imported: they are kept aside, with the reason, and you decide whether to fix them and upload again.
Once it finishes, reminders are already scheduled. If one does not go out, see why a reminder is not sent.
Upload your spreadsheetConnect your invoicing email
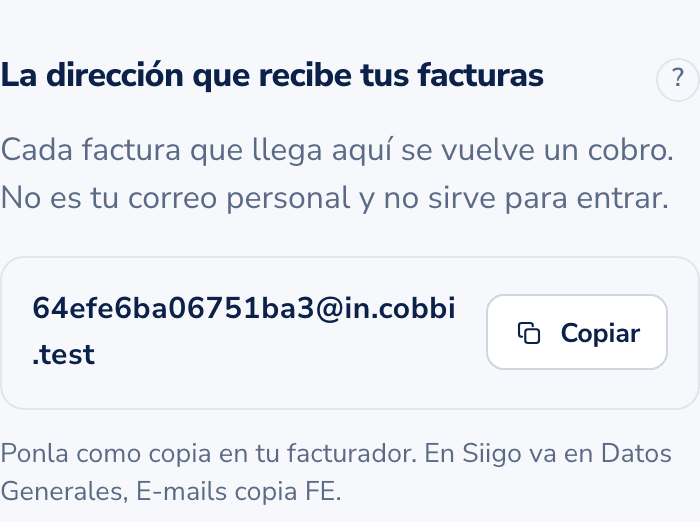
If you already issue electronic invoices, do not type anything twice. Your invoicing tool sends the invoice to your Cobbi inbox and the charge is created on its own, with the customer, the amount and the due date that come in the XML.
We never ask for your invoicing password and we do not connect to your account. It is just email.
Do it in three steps
- In Settings, copy your inbox address. It is unique to you and it only receives your invoices.
- If you use Siigo, turn on automatic forwarding of invoices to that address right there. With other invoicing tools you may need to set up the forwarding rule yourself, in your own mail provider, because not all of them let you send a copy to a fixed address.
- Send a test invoice and approve the sender when we ask. That is all it takes.
Why we ask you to approve the sender
That inbox is open to the internet: anyone could email it. Before a charge ever messages your customer, we check three things:
- The email really comes from where it says it comes from (SPF and DKIM). If this fails, the email is rejected: there is no invoice to save.
- The sender is on your approved list. A new sender is not rejected: the invoice still comes in, but the charge stays paused for review until you confirm it.
- The tax id issuing the invoice is yours. If it does not match, it is not rejected either: the charge stays paused with the reason in plain sight, and you decide. The one exception is a credit note: that one is rejected, because netting a balance has no in-between state.
What these checks protect is not whether the email gets in, it is that no WhatsApp message goes out to a third party before you have looked. So, except for SPF/DKIM and credit notes, the invoice is never lost: it is saved and waits for your decision.
In the meantime
Invoices you issued before connecting the inbox do not come in on their own. Those you create by hand or upload in Excel.
Connect the email